1. UK customer starts the registration process by clicking the “Sign Up” or clicking on “Continue” for the first time.
Customer directs to enter the mobile number

2. Enter OTP number

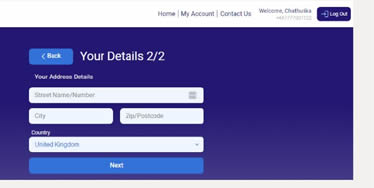
3. Enter user details
4. User receive an email for verification
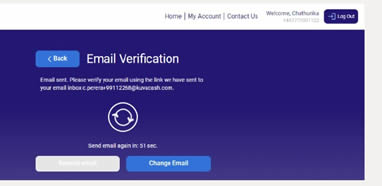
Change Email - This will allow user to change the email address
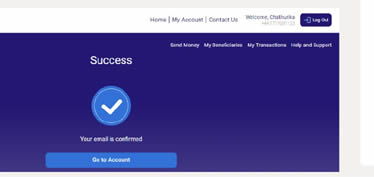
5. Verify the email. This will open up a web browser and redirect the customer to the Remittance portal to continue registration process.
6. “Go to Account” to load the created account
Yes. Please click on “Sign UP” button and proceed.
Or You can just enter the amount you need to send and click “Continue”, we will put you to the registration process automatically.
You must have a +44 number to register and send money. You can register +263 as beneficiary only.
Yes this is possible.
Retry or if not please contact Kuva support.
Address that you can provide proof of residence. Ex: Where you receive your utility bills.
Check spam email OR try 'resend email' option. If not please contact Kuva support.
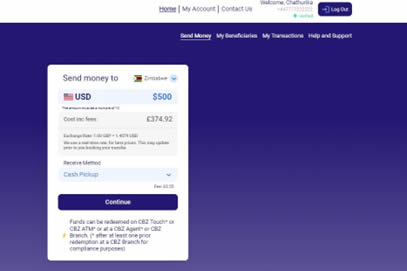
1. Enter the amount want to send and select the Receive method and press 'Continue'. “Cash pickup” is only available for individual beneficiaries.
2. If there are no beneficiaries created previously, the system will load to create a beneficiary
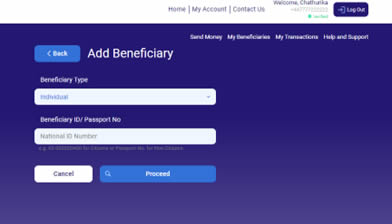
If the beneficiary is a person; select “Individual” from the beneficiary type dropdown click on the “Proceed” button
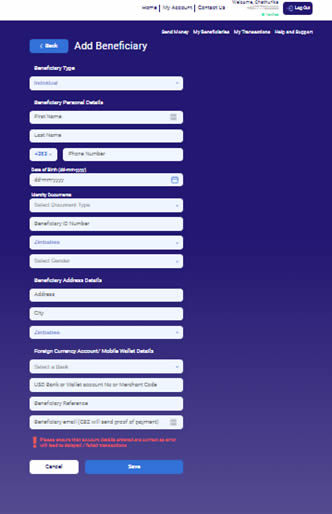
3. Enter beneficiary details
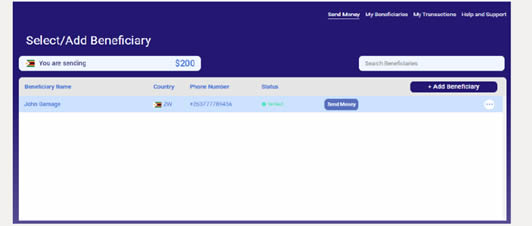
4. Select a beneficiary from the list. Mouse over the beneficiary you want to send money. The system will show a “Send Money” button
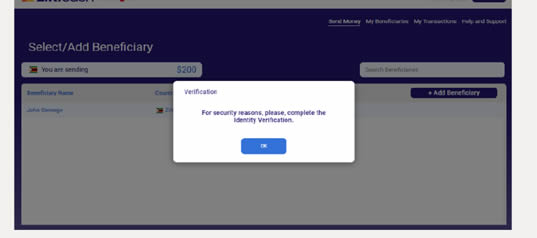
5. For the first transaction to complete, the user needs to complete the KYC 'Know Your Customer' flow
6. To Start with the KYC process, Select the country of residence. Read and agree to the privacy consent. Click on the Agree and Continue button
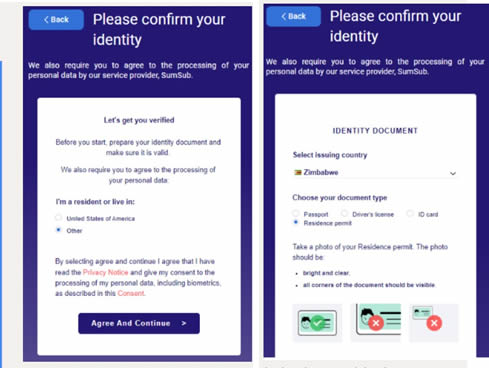
7. Select the identity issuing country and attach clear images of the documents requested here.
8. Either you can upload from your saved documents or connect to your phone and take images.
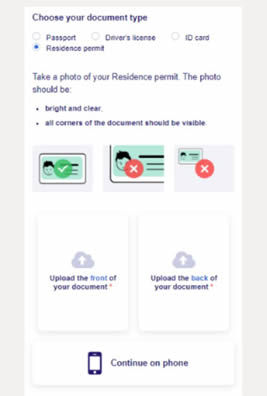
All images should be able to be read and if not, the system will reject them
9. Once KYC approved, user can proceed to the next steps to create the transaction. Select the beneficiary and proceed Select 'Source of Funds' and 'Reason for Transfer' and click “Send Money”
Users only allow to send an amount in multiples of 10.
No, its only in your first transaction.
It will take about 1- 5 mins to check user documents and approve.
It can be because images are not readable. If you are trying the same image, please take new images and try to upload.
Please check your email. Maybe your documents got rejected, we are sending an email notification with the status.
If there is no email even after 1 hr, please contact Kuva support
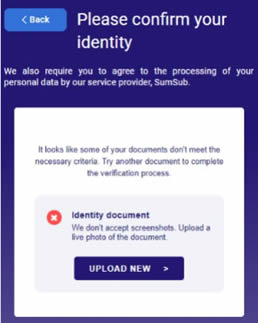
click on the “Upload New” button on the site and resubmit the documents.
1. Users can select either Credit card or Bank transfer to proceed the payment
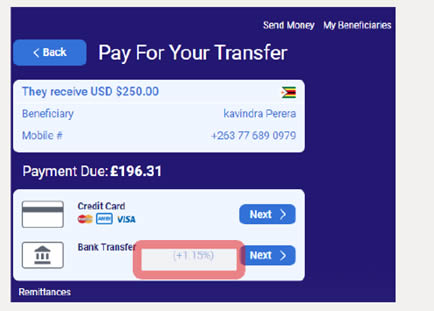
It will list the payment method with the lowest fees on top.
2. Percentage of the fee difference is shown in front of the payment provider with higher fees.

If the user selected the payment method with the higher fee then extra fee amount will be shown as the 'Payment Method Fee'
By selecting 'Back to Payment Method' option user can go back to the screen with Payment method list.
3. If user select Credit Card, then Click on the “Pay with New Card” button to add a new credit card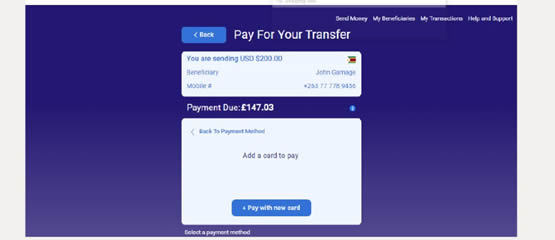
4. Enter credit card details and select the “Save Card” check box if you would like to save this card for future use
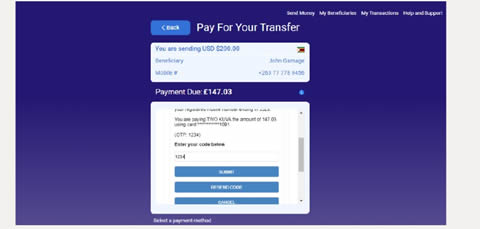
5. If your credit card is configured to verify with OTP, the user will get an OTP via SMS. Enter the OTP and Click Submit
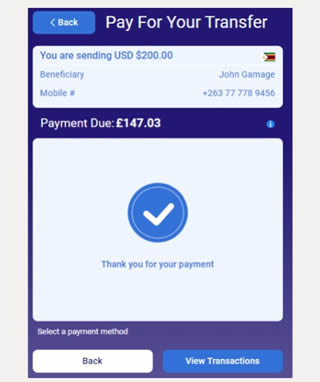
6. User can view the created transaction by clicking the “View Transactions” button
7. If user select Bank Transfer as the payment method. Click on “Bank Transfer” tab
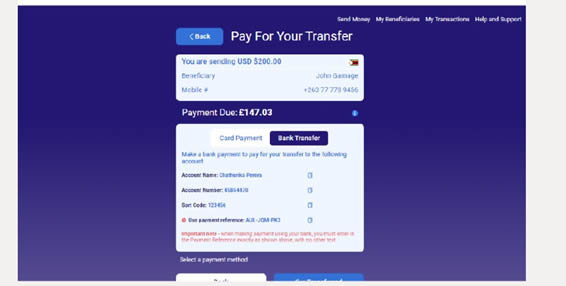
User can see bank account information to send the bank transfer
8. Click on “I’ve Transferred” button to confirm. User MUST use the same reference code given in the screen for bank transfer. If not, the transaction will fail to send
9. When a transaction is paid and the system acknowledges the payment as received, the system will generate a Redeem code and send this to the beneficiary via SMS to the number registered when creating the beneficiary.
Also an SMS will be sent to the sender with the same details.
10. If the sender selected the receiving method as “Cash pickup” beneficiary will send the redeem code to present when cash pickup.
Once you create your first transaction, the system enables a view to check this.
Go to My Account -> Limits

Cost includes Amount you need to send + All our fees in GBP
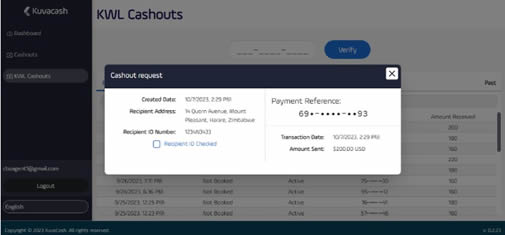
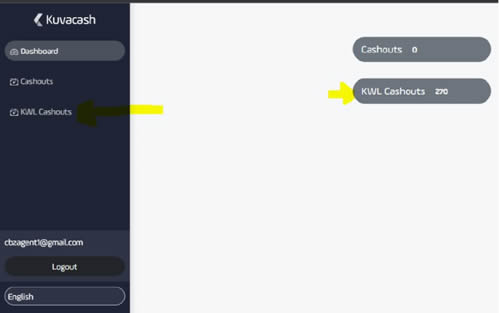
Login to the Agent portal and go to “KWL Cashouts” page to see all open transactions which are not yet redeemed.
Select the transaction you need to check details.
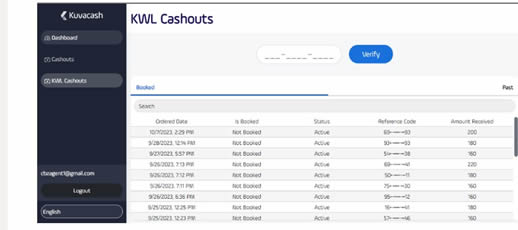
It will open a popup with transaction details.